|
List View Designer
The List View Designer makes it easy for you to design and apply your own view of a selected List View. This involves selecting the fields (the columns) you want to see, the order in which you want to see them and how much of them you want to see (the column width).
You open the List View Designer by clicking on the Wrench  Advanced View button. Once designed, you can select which List View to use, by simply selecting it from the drop-down list of currently available List Views. Advanced View button. Once designed, you can select which List View to use, by simply selecting it from the drop-down list of currently available List Views.
The system will apply the same filter which is applied against the base List View you used as the starting point.
Layout
Key
|
Notes
|
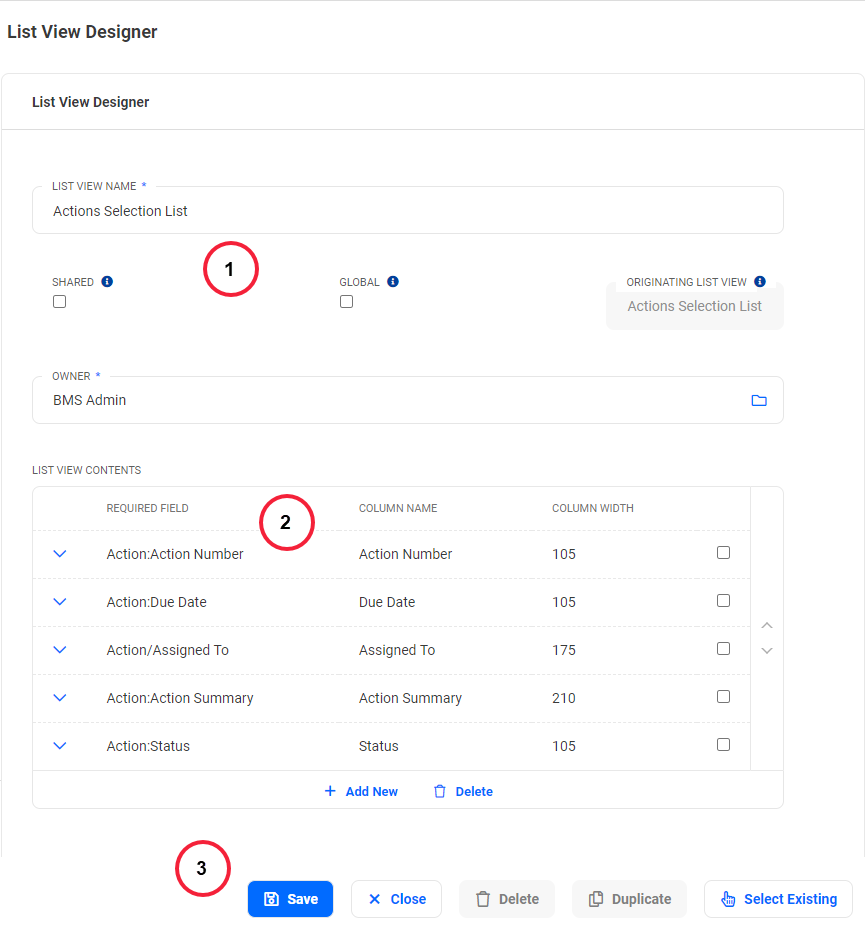
1
|
The fields for the List View design, where you provide the name of the List View, who created it and if it can be shared or not.
- Shared views can be selected by other users with the 'List View Edit' role when they want to define a view.
- Global views are applied to users who do not have the 'List View Edit' role. Users who have the 'List View Edit' role may specify a custom List View as their own default view.
|
2
|
The embedded form where you define the columns for your List View.
|
3
|
List View Designer toolbar. Allows you to access all List View Designer functions.
|
List View Designer fields
This table describes the fields shown in the List View Designer and its embedded form, List View Contents.
Field
|
Description
|
List View Designer
|
List View Name
(Required)
|
The name you want to call your custom List View.
|
Shared
|
Allows the Administrator to make a 'private' user defined List View into one that can be used by other users and appears in their selection lists. It will be available via the Select Existing button.
|
List View Contents
|
Required Field
(Required)
|
The field or relationship you want to display in the List View (see  below). below).
|
Column Name
(Required)
|
The label for the column header.
|
Column Width
(Required)
|
The width of the column in pixels.
|
|
When you use relationship fields in a List View, the parent information is repeated for each related record. For example, if an Incident has three related injuries, each injury will be listed as a separate record, with its parent incident number repeated.
|
Toolbar
The toolbar gives you access to following functions in the List View Designer:
Button
|
Function
|
Save
|
Saves the displayed List View content and applies it to the current List View.
|
Close
|
Ignores any changes made in the List View Designer window.
|
Delete
|
Deletes the currently displayed List View.
|
Duplicate
|
Duplicates the currently displayed List View in the List View Designer window.
|
Select Existing
|
Opens a list of previously saved and shared user defined List Views defined by other users (not your own), from which you can select, to display in the List View Designer window.
The User Views you see in the selection list only relate to the selected view in the Navigator pane, for example, Open Incidents, rather than all the views for the Business Process.
|
|
