Bowtie Configuration RequirementsComponent Requirements The Bowtie model consists of four components, which must all be present in your system:
If any of these components are not already present in this structure, they will need to be manually configured.
Configuration Mapping In addition to requiring components in a specific structure, the Bowtie system requires a number of other fields, relationships, list views and lookup items to be in place – the requirements are detailed in the bowtie-mapping.txt file. If not already existing, these items must be manually configured. Once all the required configuration is in place, the bowtie-mapping.txt file must be updated with the IDs of the configuration items, so that the Bowtie canvas can adapt to this specific configuration. Customers starting from Standard Configuration v2019.2 will not need to perform any mapping, because the default configuration items will all already be in place. The configuration mapping is performed in the file bowtie-mapping.txt, which typically is located under the folder <Drive>:\SAI360\config\. Follow these steps:
Auto-save Image of Bowtie as File Attachment One of the required fields is an image field on the "Risk" component. The system will auto-save an image of the Bowtie every time changes are made to a Risk record (i.e. this image will always be up-to-date) so that the image can be used in BI Reports for example. Adding Subtitles to the Header of the Bowtie Canvas Out of the box, the Bowtie canvas shows the mapped Risk Description field as the Header Line (along with the form’s Auto-Number). However, if more information is required, up to 3 additional subtitles can be added
This can be achieved by adding UniqueIds and BMS_IDs of the required fields to the RHS in the optional lines of the bowtie-mapping.txt Configuring a List View to open Risks directly in the Bowtie Canvas Any Risk can be viewed in a Bowtie canvas by opening the record in the normal Risk form and selecting "Bowtie" from the Wrench menu. However, to be able to create new Risks directly from the Bowtie canvas or open Risk records on the Bowtie canvas directly from a list view, a Risk List View, (based on your mapped Risk component) must be configured to have its "Detail Form" Field set to the "Bowtie Canvas".
|
|||||||

 NOTE:
NOTE: 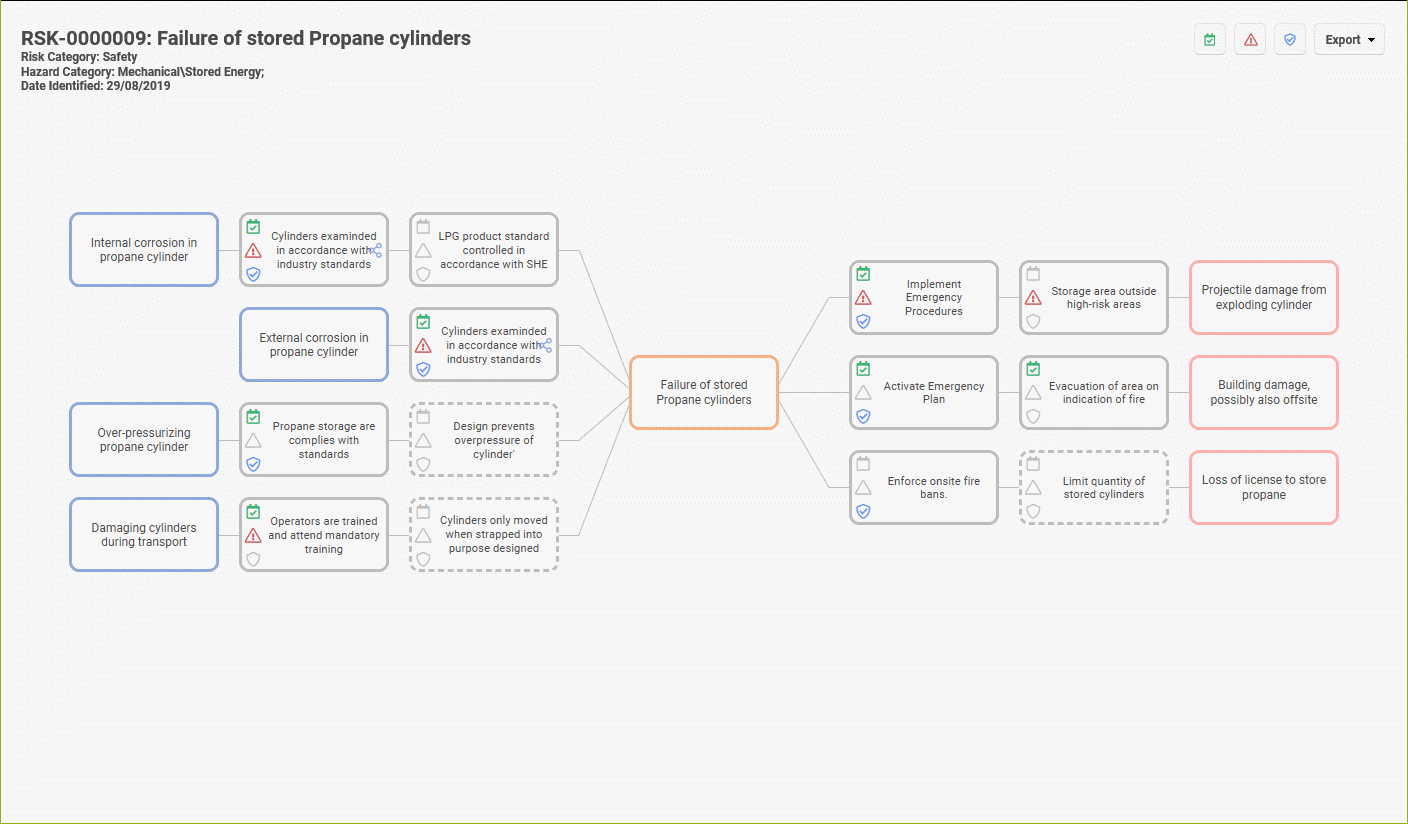
|
Back to top |
 Copyright Evotix |