|
Using the Bowtie Canvas
Opening a Bowtie
Users can manage Risks in a Bowtie canvas via the following mechanisms
- To create a record as a Bowtie:
- Navigate to a List View which is linked to the Bowtie canvas (see previous section for details).
Users can identify that a view is linked to Bowties by the bowtie logo on the NEW button:
 - Select New
- To manage an existing record as Bowtie:
- From any List View linked to the Bowtie canvas, select any record and open it.
- From any other Risk List View:
- Open a Risk Record
- Navigate and select Wrench
 Bowtie Bowtie - The Bowtie will open in a new browser tab
Navigate and use Bowtie
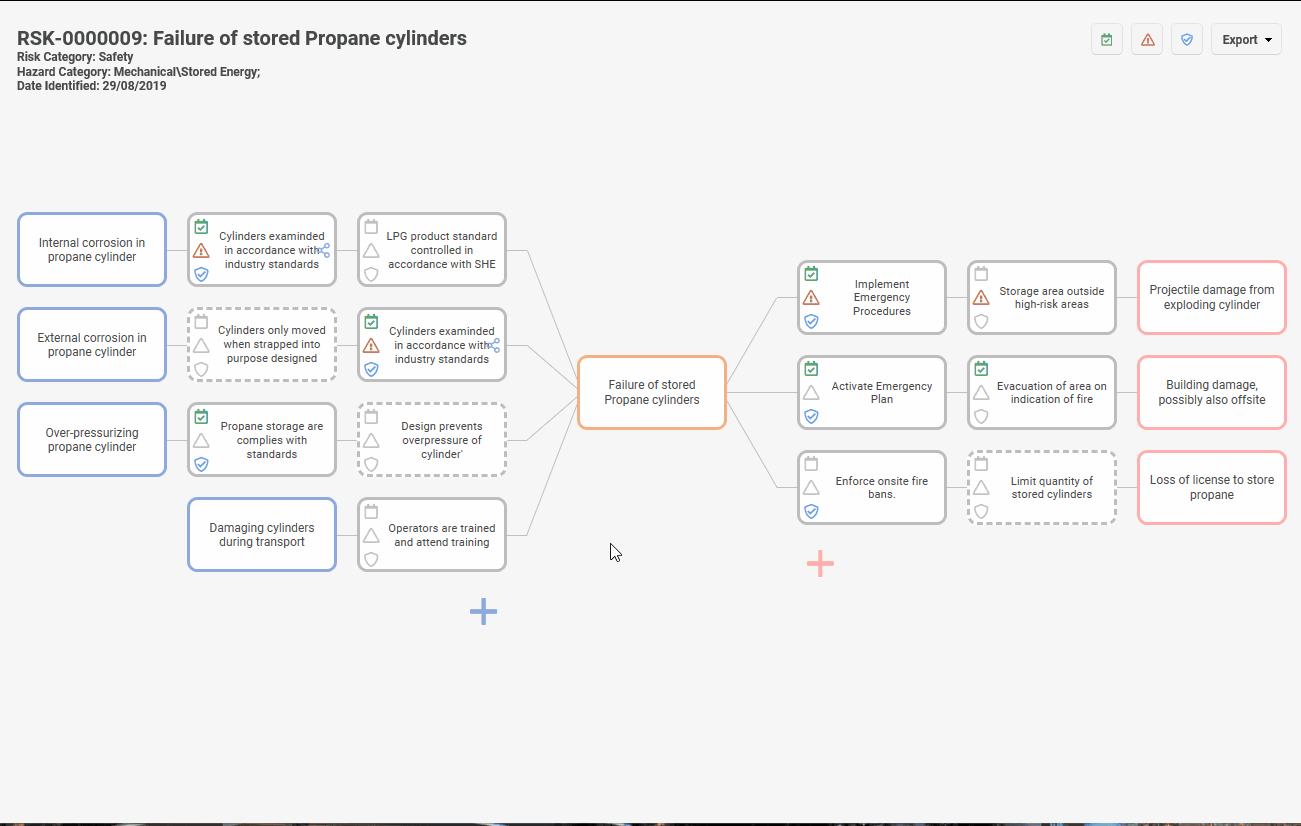
- Each Bowtie has a single Risk as it's central element.
- To create a Threat or Consequence record, click on the "+" to the left or right of the Risk, and enter a description.

|
NOTE:
There is no need to manually save, as the system is saving all changes as you go.
|

- To add a new Control, click the "+" sign which is displayed near the central Risk when hovering over a Threat/Control row. Again, enter a description
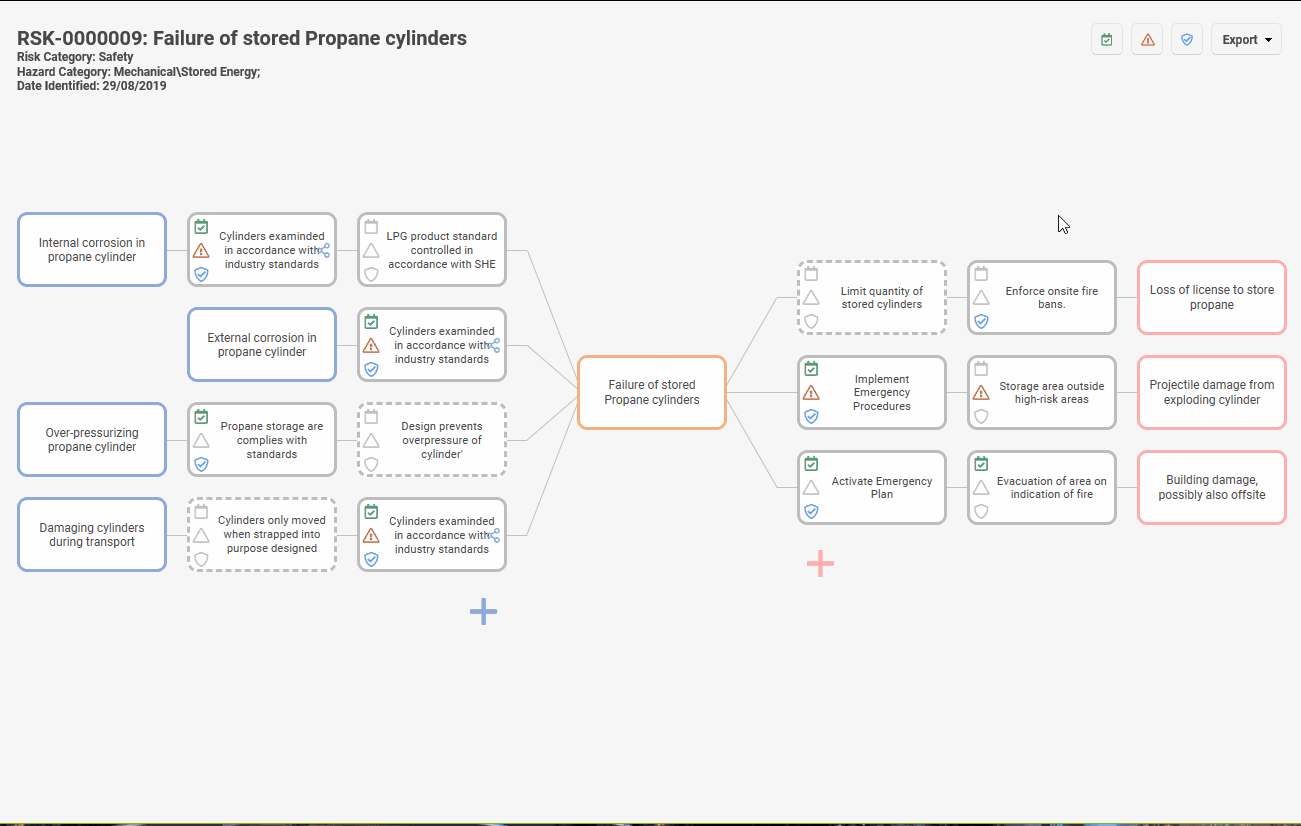
- You can move elements around by drag and drop. Supported actions are:
- Move Controls by dragging them anywhere on the canvas.
- Share by holding the 'CTRL-key while dragging Controls from one Threat/Consequence to another. This is essentially identifying a Control that mitigates more than one Threat/Consequence.
Once a Control has been shared, the following operations for that control are no longer supported:
- Moving a shared control back to the original parent
- Moving a shared control to a different parent type (e.g. from 'Threat' to 'Consequence' or vice versa)
- Sharing a shared control back to the original parent
- Sharing a shared control to a different parent type
- Move Threats/Controls vertically.

|
NOTE:
Creating or updating a Risk in the bowtie canvas will not trigger any system form actions or validations (Analytics Rules, if configured, will be triggered). There is no change to the system behavior when editing the Risk as a detailed form.
|
Here some brief videos demonstrating some of the capabilities:
Drag & Drop

Filtering

|


