|
Defining the Outline and Content of Forms

|
Prerequisites
The steps below are made under the assumption the underlying Component, which the form is based, and all required fields, have been defined.
Please see the Web Application Component Management Tool for more details.
|
With the use of the Form Designer, the system offers a WYSIWIG interface to define the Layout and Content of a Form.
Configuration is done by simply:
- Selecting the Starting (Root) Component.
- Defining the layout, by building the 'Grid', which consists of rows, and cells.
- Dragging and dropping the required fields or relationship into the cells.
- And, if necessary, adding further pages.
Form Designer
The Form Designer is made up of 4 different regions, which in the image below are marked by different colors:

The function of the various panels is as follows:
PANEL
|
CONTENT
|
Content Palette
|
The Content Palette consists of the following sections:
- Data Fields:
A list of all fields of the current Root Component, as well as all the Component's Relationships. - Form Elements:
A collection of commonly used field types, for example Text Fields, Subform, Free Text, Lookups etc. These elements can be used to 'mock' up a Page or Form, or to fill 'gaps' in the design when the corresponding Data Field hasn't been created yet. - Move:
A holding pen when a field needs to be moved from one page to another. - Dynamic Rows:
An interface to define dynamic rows - i.e. rows in a page which will only be shown to the end user when necessary.
|
Canvas
|
This is the main control, where you:
- create Rows, and Cells within the Rows
- create and modify Pages
- you can drag and drop items from the Content Palette
|
Cell and Row Control
|
These controls enable you to add and delete Rows and Cells, and also to move Rows up or down on a Page
|
Toolbar
|
From here, you can access the builders to define Defaults, Validations and Actions, Form Properties, and to save the Form.
|
I want to define the Outline of a Form: add Rows and Cells to a Page, add Pages to a Form

|
It is not possible to define the individual height and width of rows and cells. Instead, the system will calculate these automatically:
- Height: is determined by the 'tallest' object in the current row.
- Width: is determined by the number of cells in a row. All cells in a row will have the same width.
|
To define the Form layout, you will be using the canvas, together with the controls on the right hand side:
For the task of ...
|
I need to ...
|
Adding Cells to a Row, or removing Cells from a Row.
|
Use the Cell Control in the right hand panel:

- Adding a Cell: cells will always be added to the far right of a row.
- Deleting a Cell: cells are always deleted from right
 left. left.
|
Adding Rows to a Form, or removing Rows
|
Use the Row control on the right hand panel:

- Adding a Row:
- the number of cells in a new row will be determined by the number of rows from where you clicked the '+' icon.
- you can insert rows at any point. Already existing rows will be moved down accordingly. - Deleting a Row:
- the system will remove the entire selected row.
|
Adding and Naming a Page to a Form, or removing Pages.
|
Use the Page control on the top of the canvas:
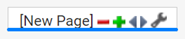
- Adding/Inserting Pages:
- you can add or insert pages at any position.
- clicking on the '+' icon will insert the new page to the right (for Tab Forms), or below (for non-Tab Forms) of the current page in the Web Application. - To Name a Page: click on the wrench symbol. The system will open the Properties window, in which you can enter the name.
|
Naming a Form.
|
From the toolbar at the bottom of the screen, select Properties and then enter the Form Name.
|
Saving the Changes
|
Click on the Save Form button
|
|
About the Deletion of Cells, Rows and Pages
To protect the integrity of the configuration, the system enforces certain validations to prevent the accidental deletion of
- Cells: if the data field which is contained in a cell is being used in List Views, Validations, Actions or Defaults, then the Cell cannot be deleted.
You must first remove the field from any of the above before you can delete it. - Rows: can only be deleted if they do not contain any other elements.
- Pages: can only be deleted if they are empty.
|
I want to move Data Fields and Relationships onto a Form
Once the layout of a Form has been defined, it is time to add the Data Fields into the individual Cells.
For the task of ...
|
I need to ...
|
Selecting the Start (or: Root) Component for a Form
|
Use the Field Picker on the left-hand side Content Palette.
Click on the Component (for example Actions), and the system will reveal all Fields and Relationships for this Component.
|
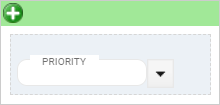
Adding a Field from the Start Component on a Page.
NOTE: Fields on the current Component are always listed first, and can be identified by
- A tile, indicating the field type (e.g. "lk" for lookup, "dt" for date)
- The name of the Component Field (e.g. Priority, Action Due Date)
|
Click on the required field and drag it into the required cell on the canvas.
To "drop" the field, just release the mouse button above the target cell.
You can drop the field anywhere the drag/drop icon is green:
|
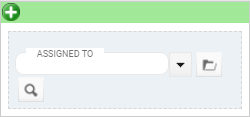
Adding a Field which allows me to select an existing record from a Related Component (this is called a Component Lookup).
Example: select a Person, or a Department.
NOTE: Relationships are always listed below the Component Fields, and can be identified by
- an Icon, which depicts the "" of the relationship.
- The name of the Relationship (e.g. Assigned By).
|
Click on the required relationship and drag it into the required cell on the canvas.
To "drop" the field, just release the mouse button above the target cell.
You can drop the field anywhere where the drag/drop icon is green:
|
Adding a field which allows me to create related records from the current form (this is called a Subform).
Example: add Actions to an Incident
NOTE: you can only use one to many or many to many relationships for Subforms.
|
Add the correct Form Element into the target field, before dropping the required relationship into the cell.
- In the Content Palette, click on Form Elements.
- Find the [Subform] Element and drag/drop it into the target cell.
- Click on the topmost Accordion Panel (which will have the current Start Component as it's title. e.g. Actions) to return to the list of fields and relationships.
- Drag/drop the required relationship into the target cell.
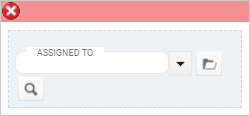
If you use an incorrect relationship, the system will display a red drag/drop icon.
|
Adding a Text Field to a Page, which can
- contain any text (which, if necessary, can be formatted)
- be used as a URL
- depict an image
|
Add the correct Form Element into the target field, before dropping the required relationship into the cell.
- In the Content Palette, click on the Accordion Panel titled Free Text.
- Add the required content to this field (see Field Properties)
|
Adding a Location/Mapping field to a page, which will place a Google map onto the form.
Users can place a pin on the map, and/or identify the location on the map.
|
As a pre-requisite for placing a Location field onto a page, it is necessary to
- In Component Management, add the following fields to the Component
- Latitude (Field Type: Number - Decimal, with 8 decimal places)
- Longitude (Field Type: Number - Decimal, with 8 decimal places)
- Address (Field Type: Text - 255 characters)
- Map Data Field (Field Type: Memo) - In the Content Palette, click on the Accordion Panel titled Form Elements.
- Find the [Location] Element, and drag/drop it into the target cell.
- Configure the field as required (see Field Properties)
For more details about Map fields, please follow this link.
|
Adding a Label Field to a page
|
A Label Field (displayed as a Header or a Note) can be used to display short, static information on a Form. Unlike the Text Fields above, these fields cannot be formatted (other than by applying CSS class).
|
Adding a Rich Link Field to a page
|
With a Rich Link field, you can configure links to external sources, such as Videos or Files.
- Title*, Summary: to label and describe the link
- Link:(optional) URL to the required link ideal for a static link that will display the same URL/link in all forms
- Data Field: (optional) select a text field that will store the URL
- Icon Code: provide the code for the desired Icon next to the field (see below for details)
- Additional CSS Class: clients can further refine the look and feel for this field by providing a CSS class. Please contact your Evotix representative for further information
Icon Code
To define the icon for the current field, follow these steps:
- Navigate to the following URL: https://fontawesome.com/search?s=regular
- Scroll for or search for an icon
- Click on the icon of choice
- Find and click on the Unicode - e.g.
f03d for a 'video' icon - Use that code as the Icon Code
|
Adding a Questionnaire to the current form.
|
Before adding a Questionnaire field, there needs to be a relationship between the current component and the Questionnaire component.
Once established:
- Add a cell on the page.
- Click on the relationship to the Questionnaire Component.
- Drag and drop the relationship onto the target cell.
- The system will automatically create the correct 'container' for a Questionnaire.
|
Enabling Smart URLs
|
Smart URLs with direct links to individual records
(e.g. http://localhost:8080/<WebApp URL>/view/Actions/ACT-0000228)
require that an Auto Number field for the underlying Component is included on the Form.
This field can be a visible, or it can also be hidden.
|
NOTE:
Smart URL will only work correctly if
- the Auto Number field is configured for the Root component.
- there is only exactly one Auto Number field.
|
|
I want to 'mock up' Fields, without having defined Components or Fields
In some instances it can be necessary to define a Form or Page, without having the underlying data fields already defined.
This can be achieved by using the Form Elements, which are part of the Form Designer.
For the task of ...
|
I need to ...
|
Adding a Field to a Cell, without having the underlying data field available
|
Add the correct Form Element into the target field, before dropping the required relationship into the cell.
- In the Content Palette, click on the Accordion Panel titled Form Elements.
- Select and Drag the required Form Element onto the canvas.
|
|
NOTE:
'Mock up' fields will not be published. This means that, even if you publish the form, any mock up fields will be ignored in the Web Application interface.
|
|

